If you’re a SmartThings user and you need to update firmware on some of your Z-Wave devices, this article will explain how to do it.
I ran into this exact situation recently, and I assumed I would be able to easily update the firmware through the SmartThings hub. However, after fumbling around with it for a bit, I did a quick search and found that this was NOT something SmartThings could currently do.
Don’t worry, though. It can be done without too much trouble. This article will show you how.
Specifically, it will show you how to use the Z-Wave PC Controller software to do OTA updates for your Z-Wave devices without removing them from your SmartThings network. Here’s the basic steps:
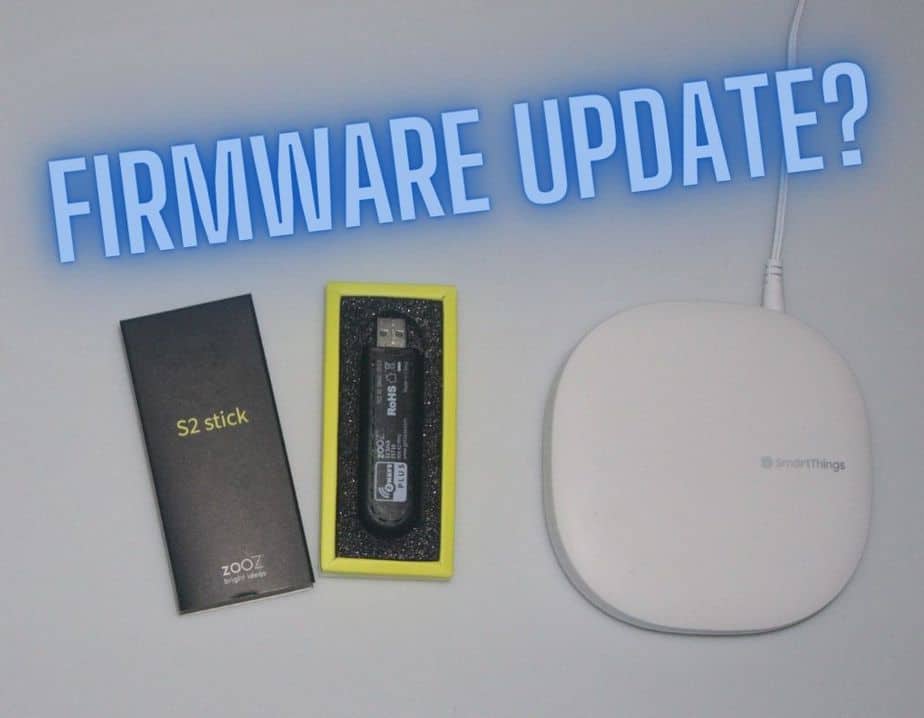
- Get a Z-wave stick
- Install Z-wave stick controller software on PC
- Add Z-wave stick to SmartThings as secondary controller
- Update device firmware
Contents
1. Get a Z-wave stick
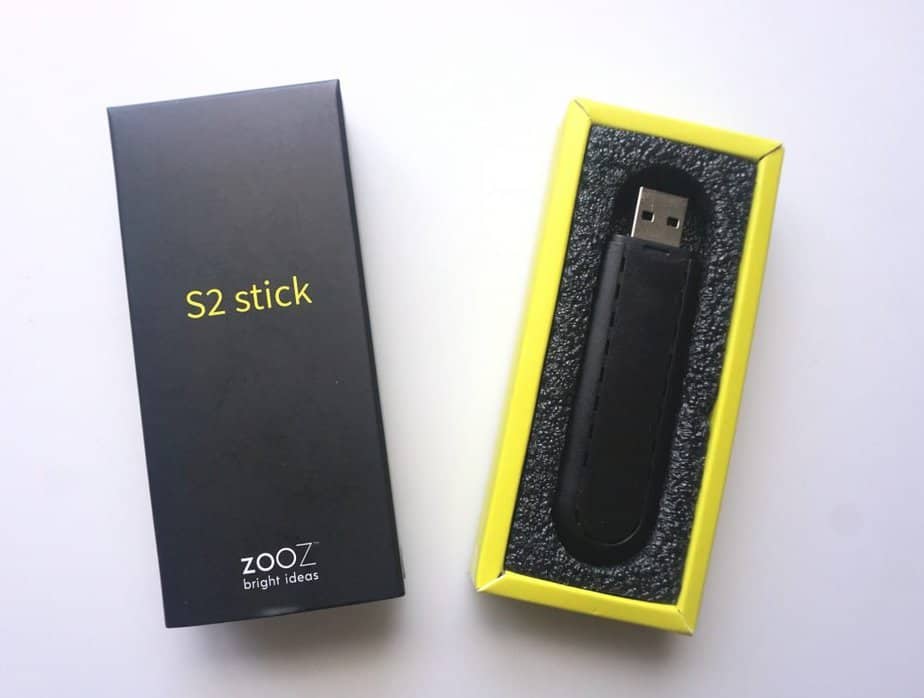
Since your hub (SmartThings) can’t do Z-wave OTA updates, you’ll need to get one that is capable of performing the updates.
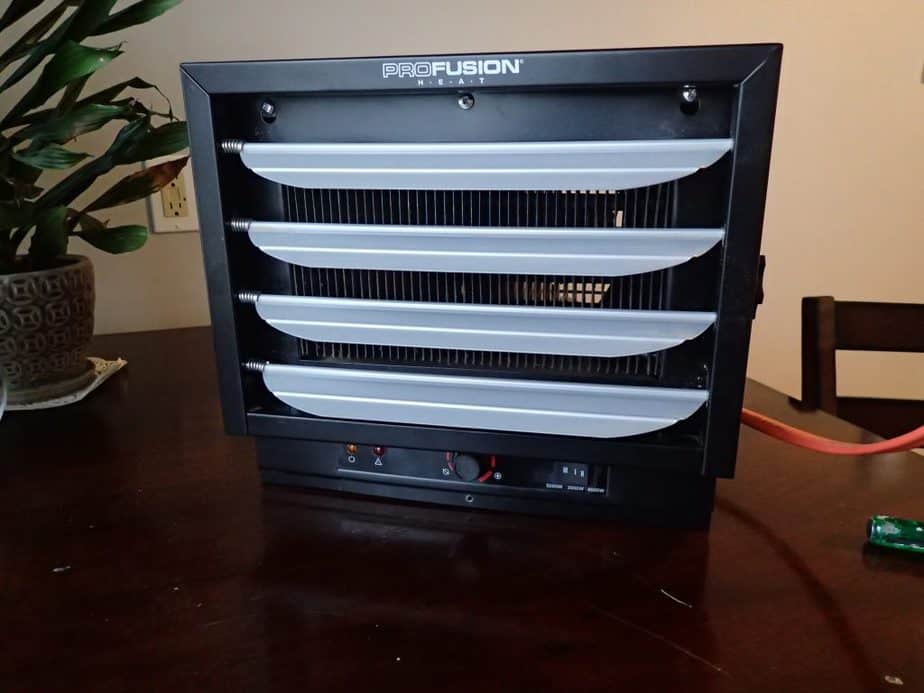
The best way to do this is to buy a Z-wave USB stick. There’s a couple models that will work, but I chose to get the Zooz ZST10.
2. Install software for Z-wave stick
Once you have your stick, you’ll need to install some software to run the stick.
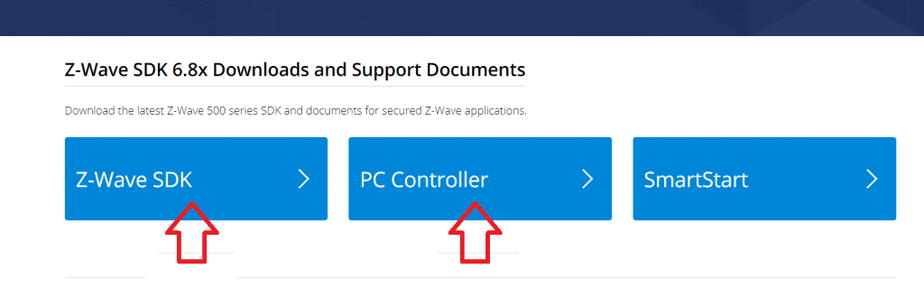
The software I recommend is free and is called Z-Wave PC Controller. You will need a Windows computer to run it.
You’ll have to download and install both the Z-Wave SDK and PC Controller located on this page: https://www.silabs.com/products/development-tools/software/z-wave/embedded-sdk. You will also need to create an account to download the software.
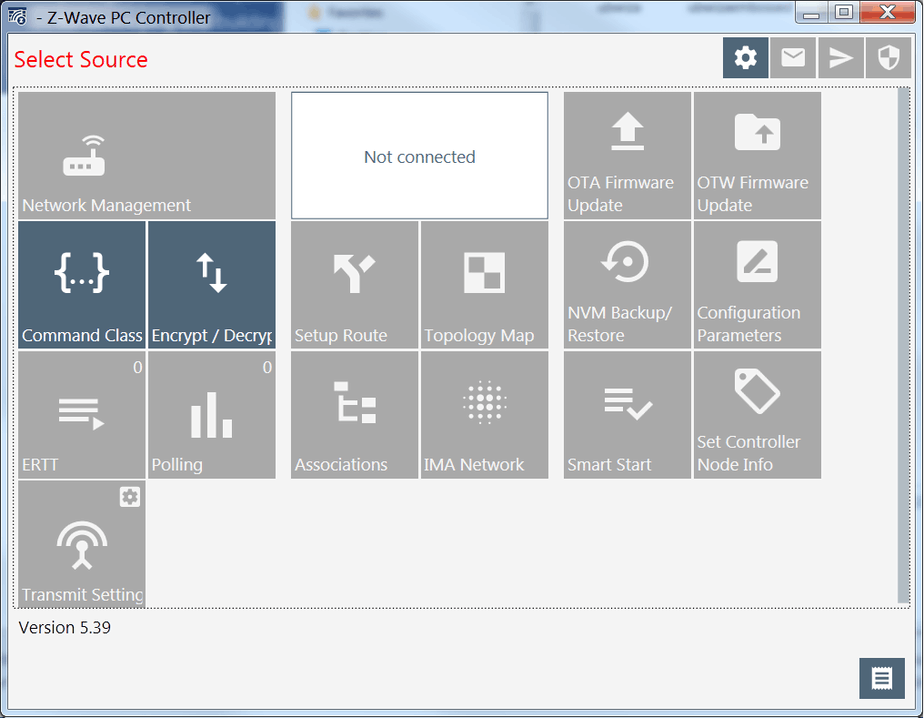
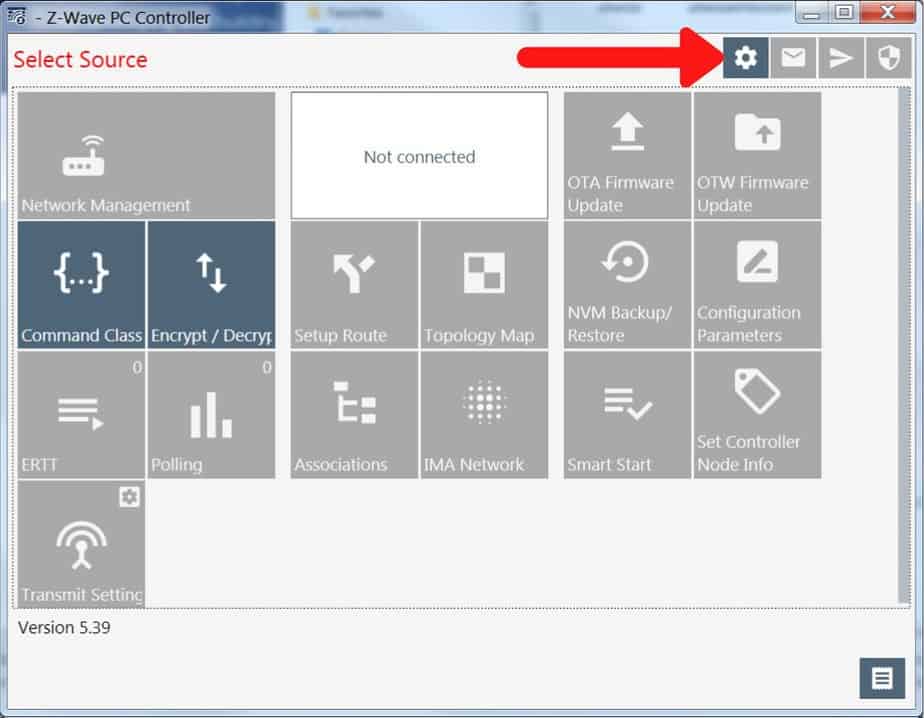
Once you’ve installed the software, open it and you should get a screen something like the image below. Then, proceed to section 3.
With this software, the updates will need to be performed one at a time. For a paid software that can do updates in batches, see the note below.
NOTE: I also purchased HomeSeer’s Z-Flash software (it was only $15), but was unable to get it working. The advantage to Z-Flash is that (if you can get it working) you can update multiple devices at once.
For example, if you had 10 of the same Inovelli switches, you could queue up all 10 firmware updates and let it run. The updates would still be done one at a time, but the software would take care of it instead of you sitting there waiting for each update to complete so you can start the next one.
3. Add Z-wave stick to SmartThings
Next, we are going to include the Z-Wave stick to your SmartThings network as a secondary controller. Using the secondary controller method will allow you to update your devices WITHOUT excluding them from your network. This method will preserve all your existing automations.
It’s important that you use the following method to add the stick to the network so that the proper security codes are shared. You could add the stick using SmartThings’ general scan and add feature, but that won’t give you the proper security to perform the firmware updates. I know because that’s how I initially did it. Luckily, there’s a bunch of helpful people in the Inovelli community that got me on the right track.
Start by plugging the Z-Wave stick into one of your PC’s available USB ports.
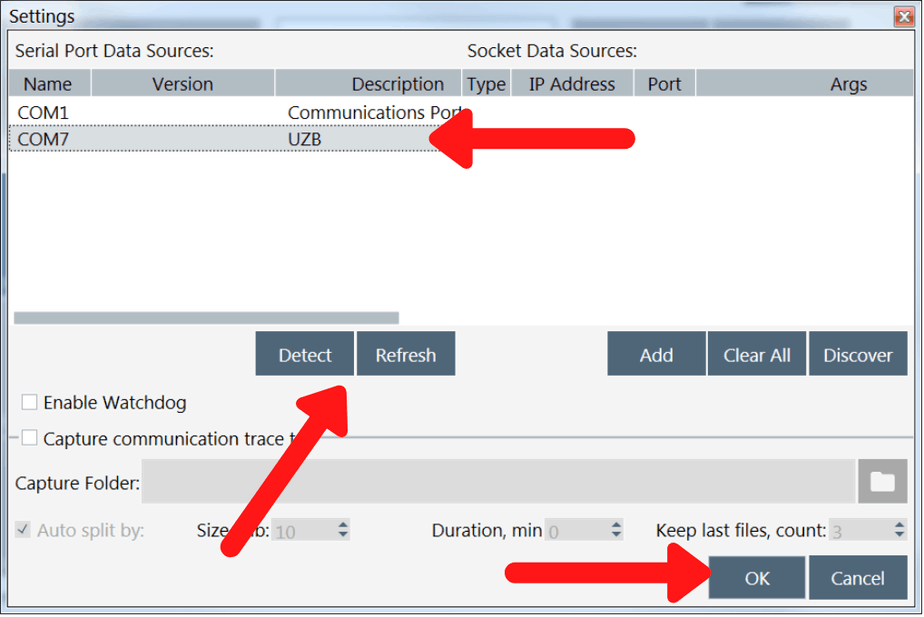
Then, select the settings option on the controller software.
Select the COM port that corresponds to your Z-Wave stick and click OK. If your stick doesn’t show up, try clicking the Detect and Refresh buttons.
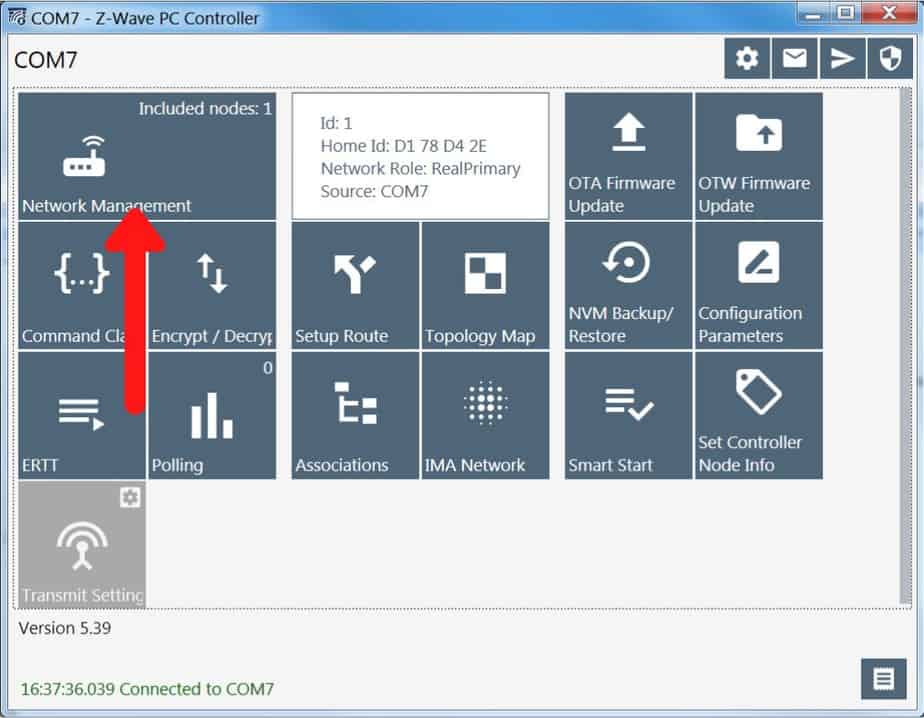
When you click OK, you should be taken back to the main window and the tiles should now be active instead of grayed out. Next, click on the Network management tile.
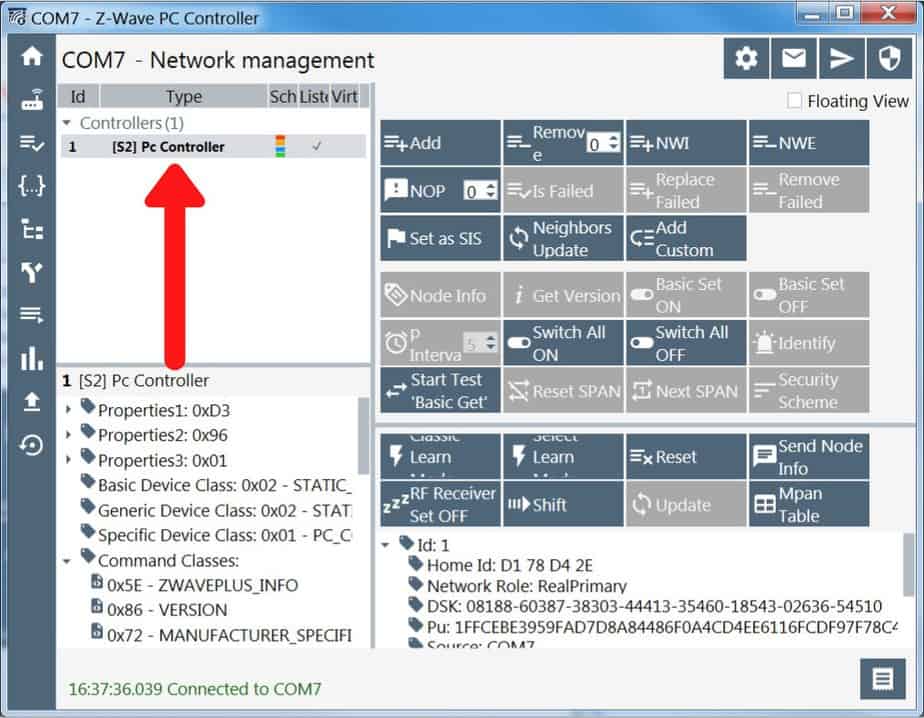
On the Network management screen, you should see your Z-Wave stick listed on the left hand side.
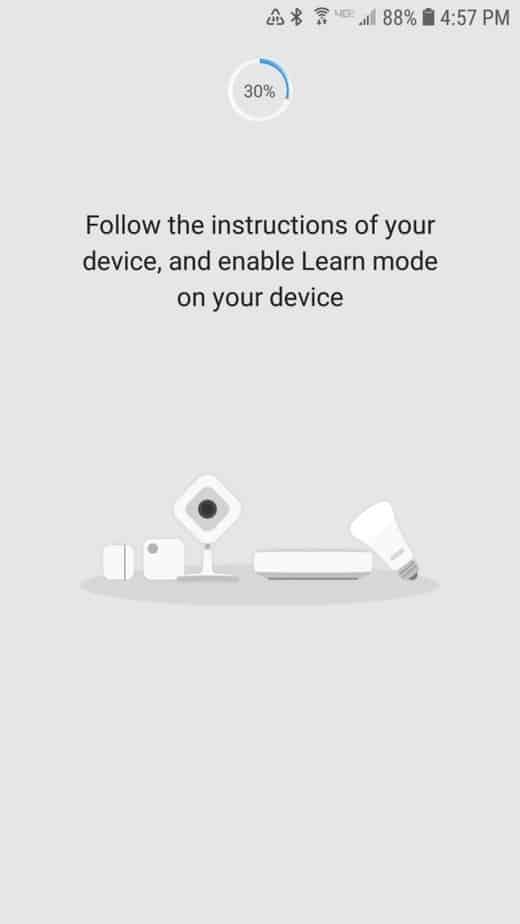
Now, leave the controller software open and switch over to your phone and open the SmartThings app.
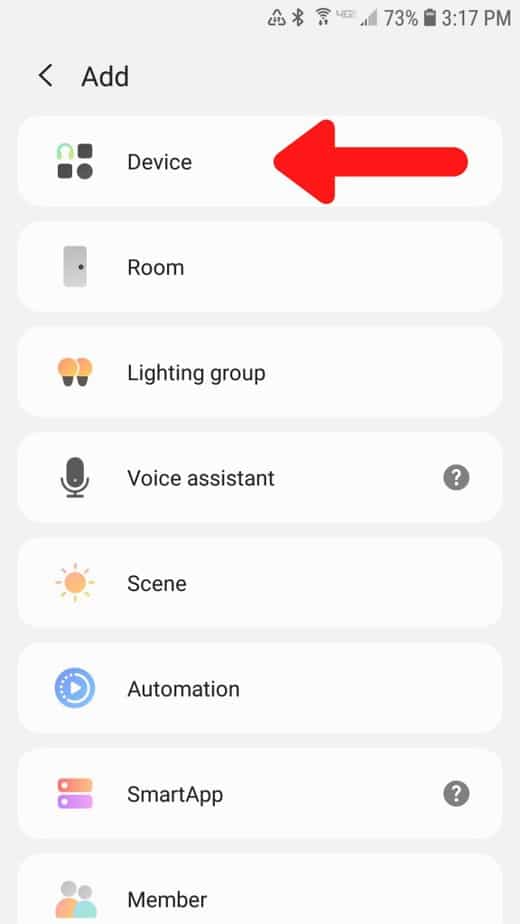
Tap the + button, then select Device.
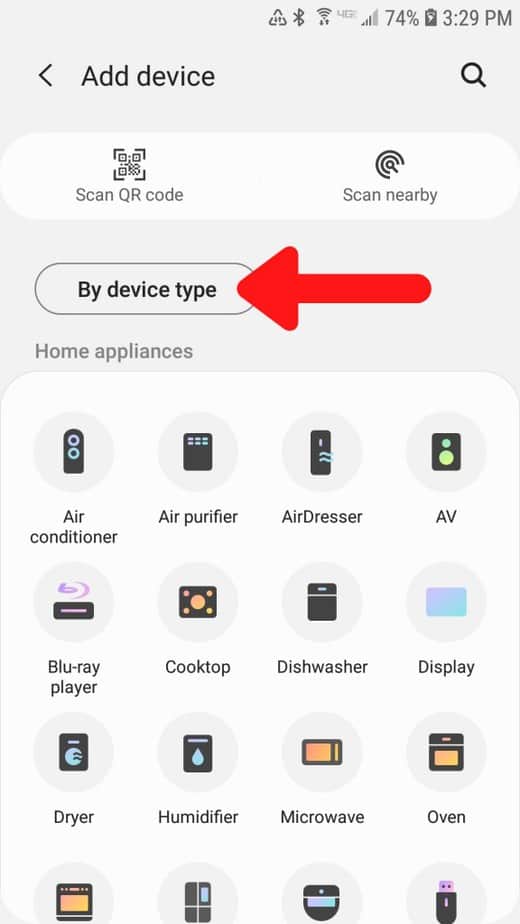
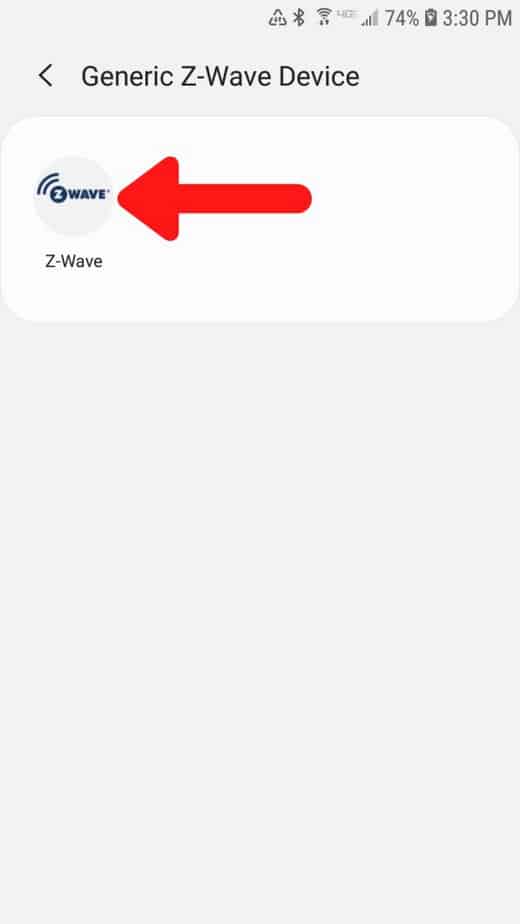
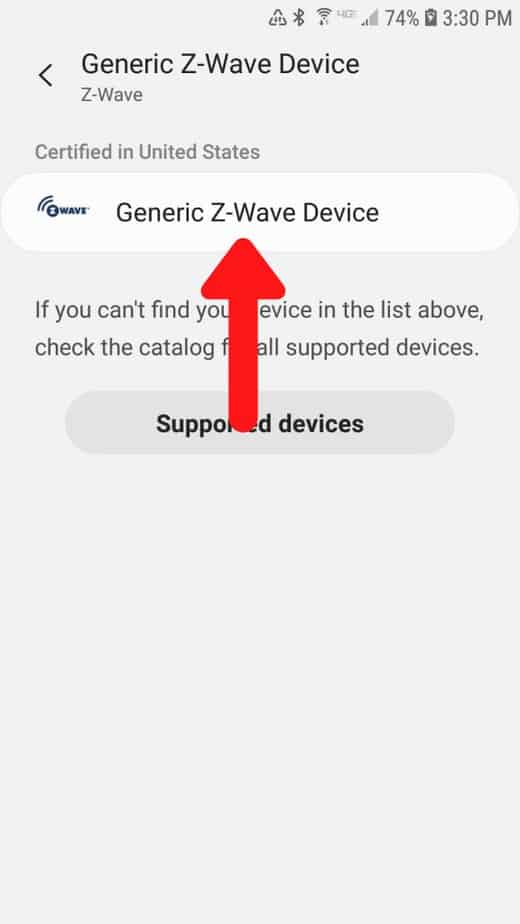
Make sure By device type is selected. Then scroll down and select Generic Z-Wave Device.
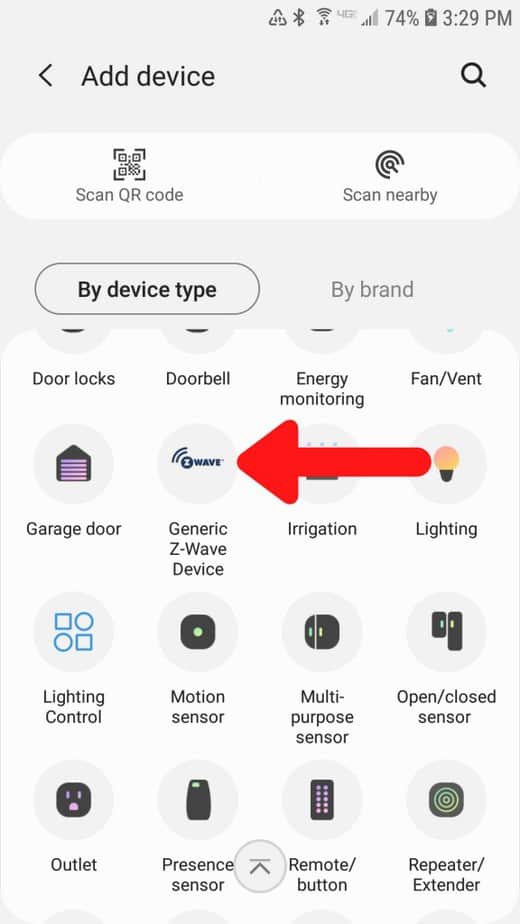
Next, tap on the Z-Wave icon, then tap on the Generic Z-Wave Device option.
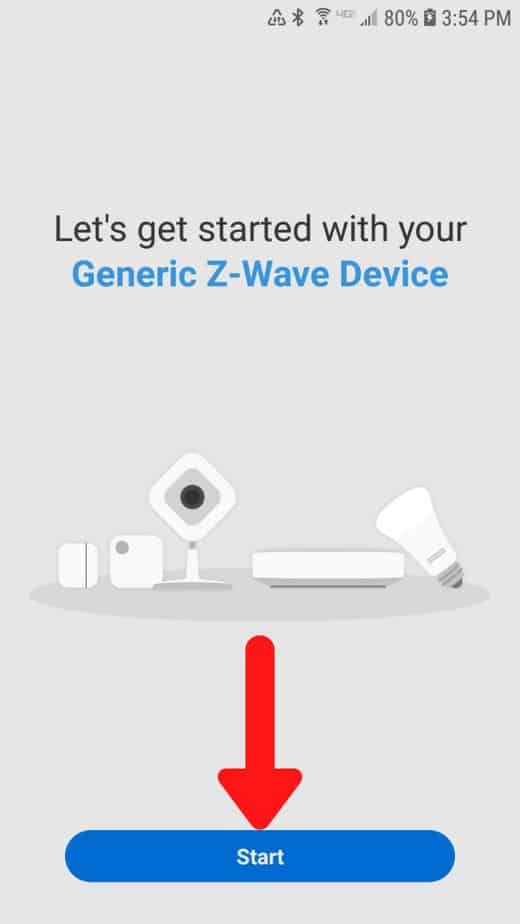
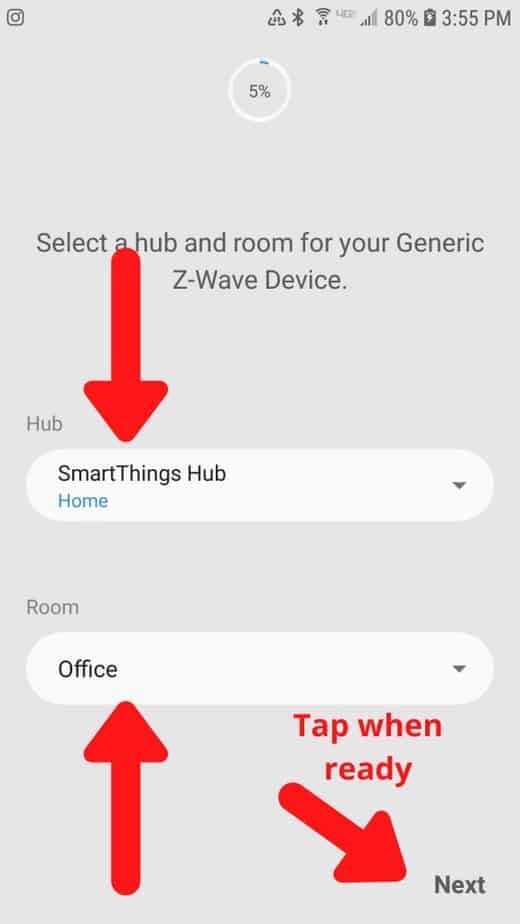
Continue adding the new device by pressing Start. On the next screen, select which hub and room you want to add it to. To continue, you’ll tap Next but don’t do it until you are ready to proceed with the controller software.
Now go back to the PC Controller software, but keep your phone with you. In the Network management tab, make sure the Z-Wave stick is selected (it should be the only device listed) then click Classic Learn Mode.
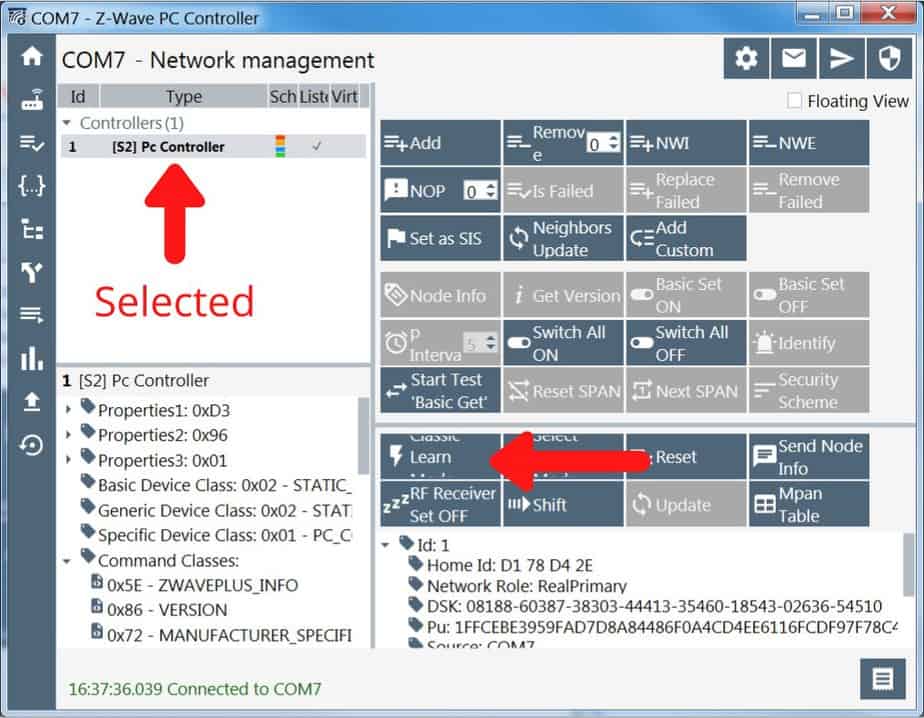
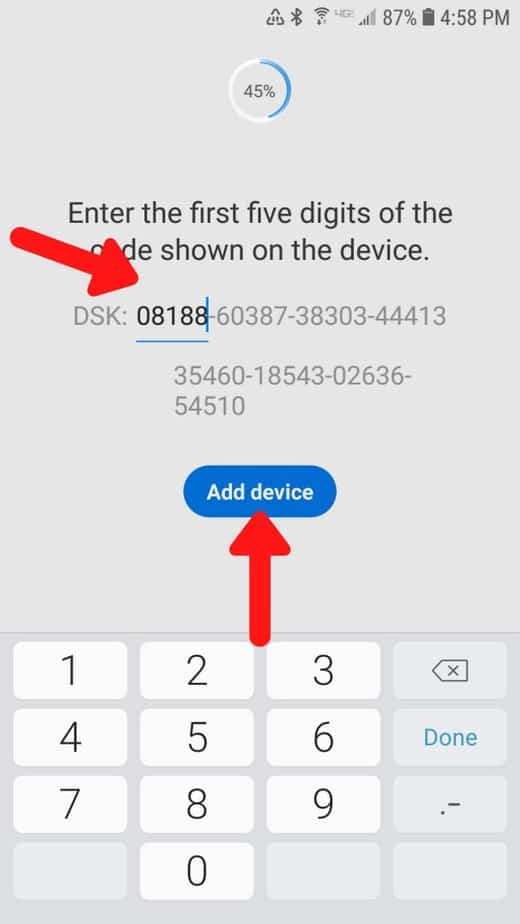
The stick will start searching for the hub. After a few moments, a window should pop up on the controller software with a Device Specific Key (DSK). DON’T close it. You will need to enter this number in the SmartThings app.
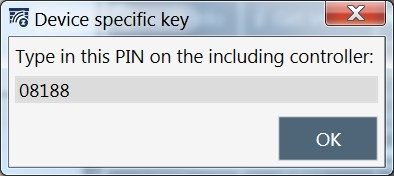
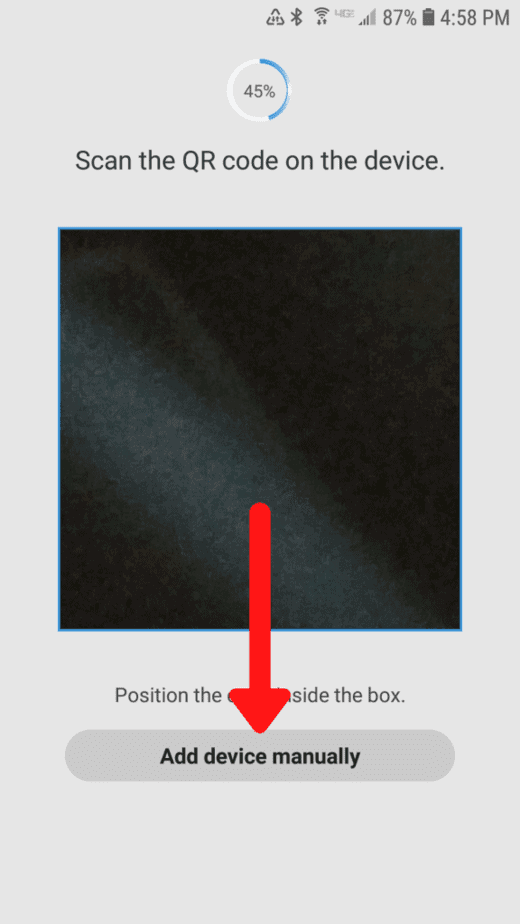
About the same time, the SmartThings app should load a screen with a QR code reader. Tap Add device manually. Then, enter the five digit DSK and tap Add device.
Finally, name your controller and tap Done.
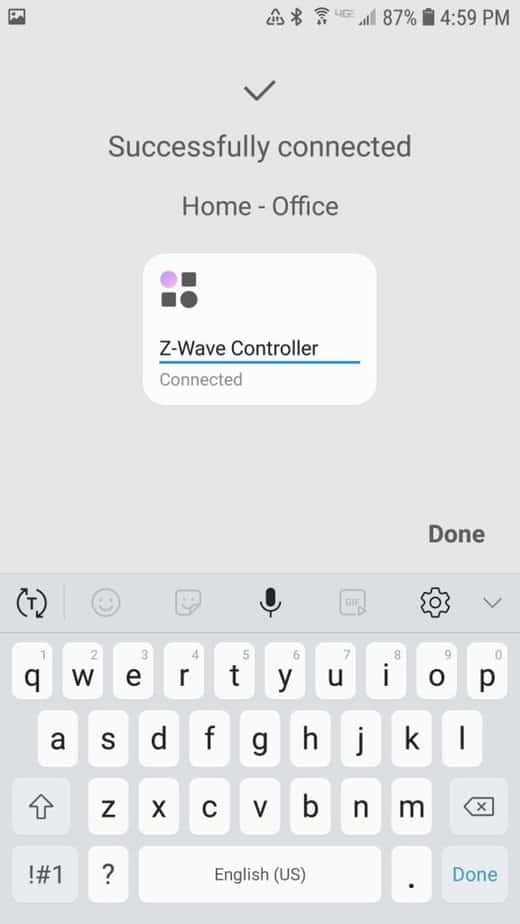
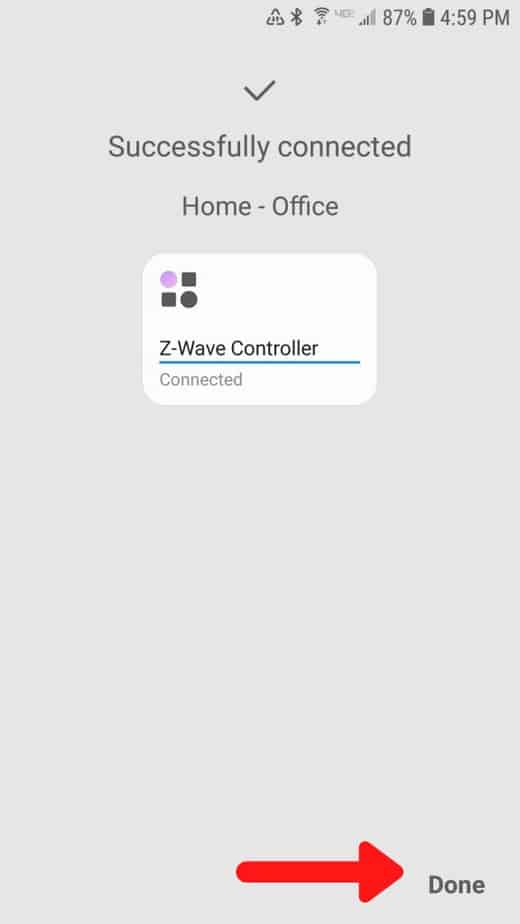
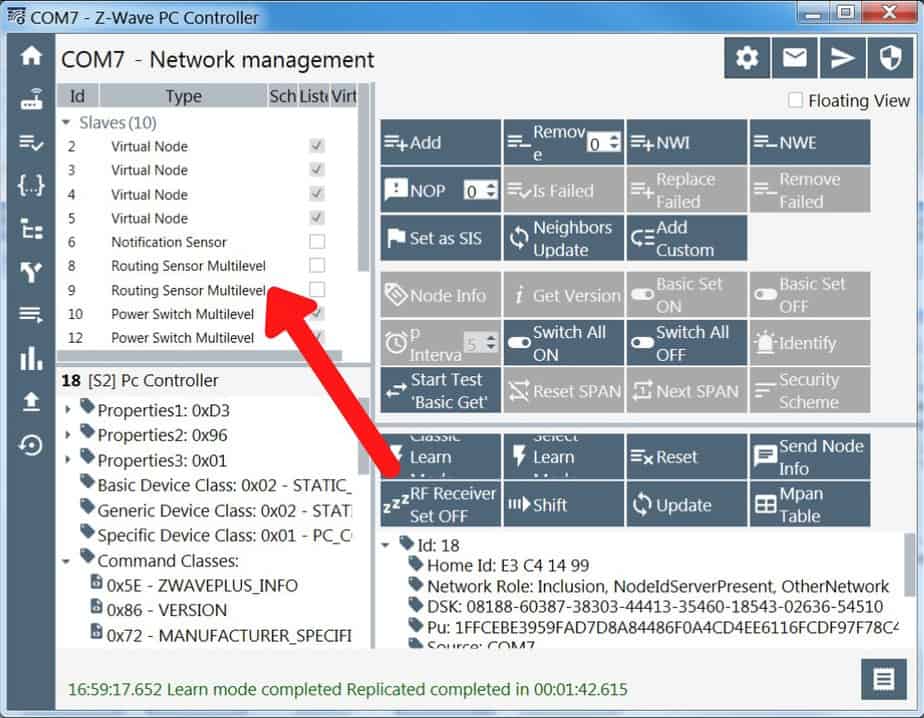
The Z-Wave stick should now be connected to your SmartThings hub. At this point, you should no longer need the SmartThings app.
You should see the device list on the PC Controller software should populate with all the Z-Wave devices connected to your SmartThings hub (below).
4. Update device firmware
You now have the Z-Wave stick properly connected as a secondary controller. This section will show you how to update the firmware. You will need to repeat the steps in this section for each device you would like to update.
The next step is to retrieve some information from the device we are going to update.
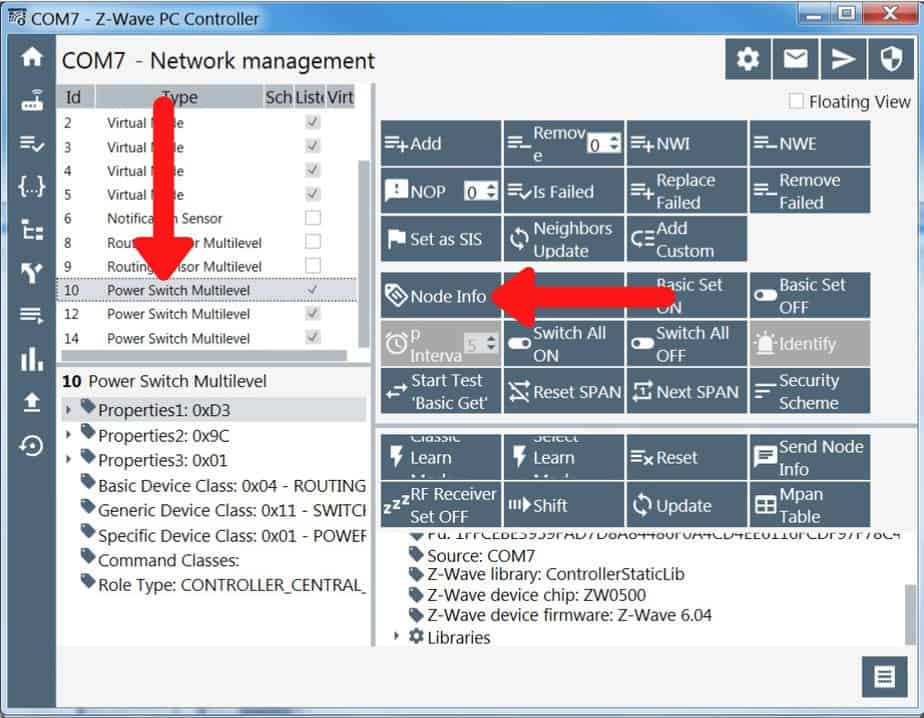
In the Network management window, select the device you wish to update. Then, click Node Info.
NOTE: If you don’t know which device Id you need to update, go to your SmartThings developer console. Select My Devices. Then, find the Display Name of the device you would like to update, and retrieve the Device Network Id. Match that Id number with the Id numbers listed in the Network management console of the Z-Wave PC Controller software.
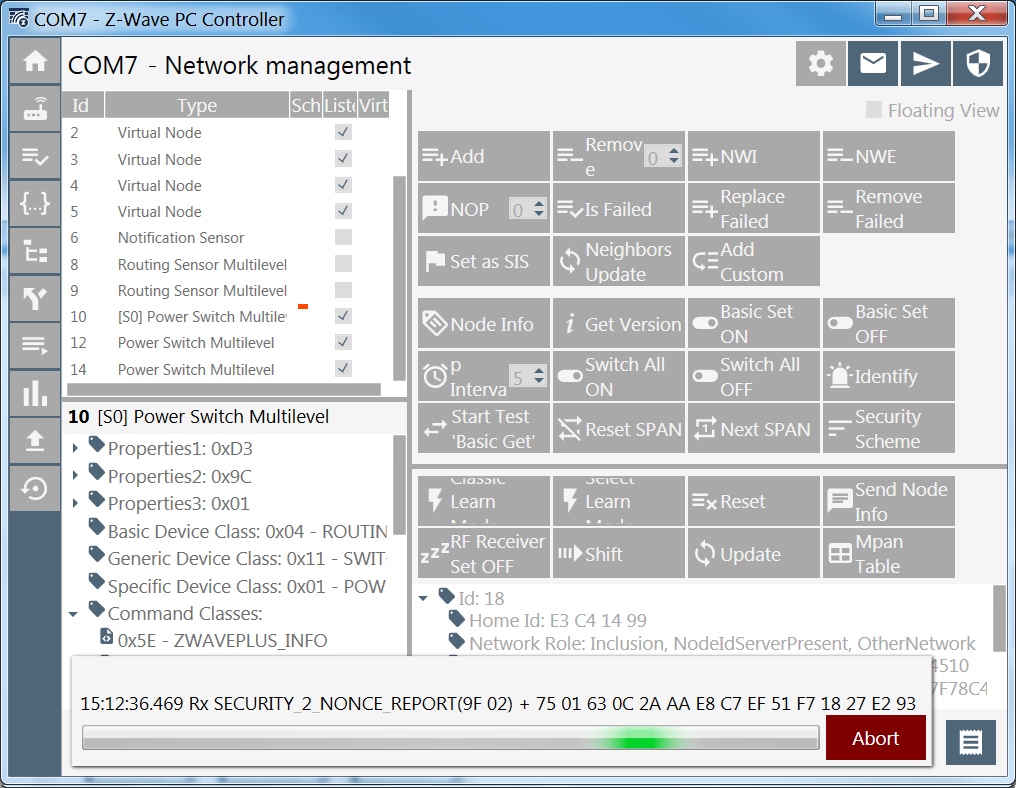
The stick will fetch the requested data.
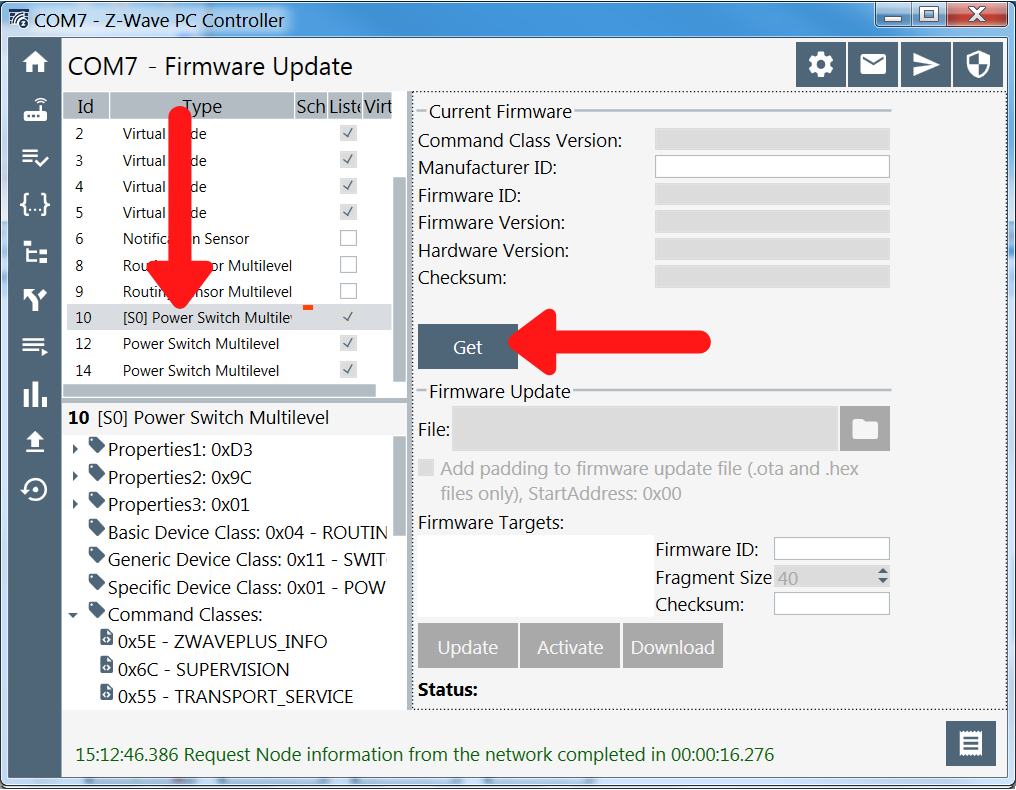
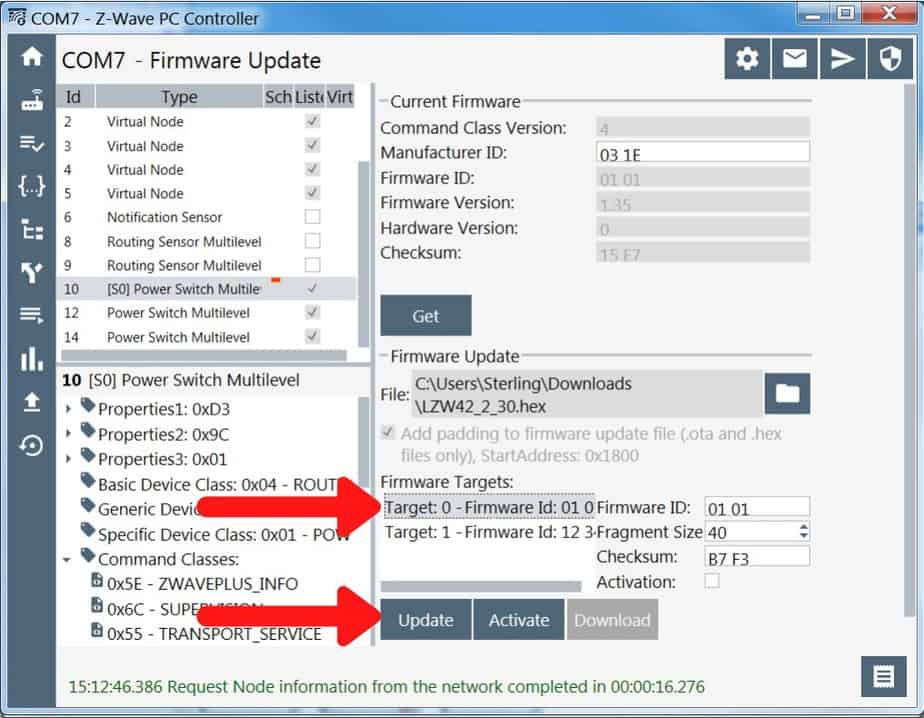
The device will be updated with its current security scheme. With the device selected, click on the OTA Firmware Update button.

The Firmware Update window will load with a bunch of empty fields. Also, notice the folder icon for the firmware update file is grayed out. To fix that, with the device selected, click on the Get button.
The Current Firmware field should populate with the device’s current firmware information. At this point, you should check the Firmware Version to make sure an update is truly necessary.
The folder icon in the Firmware Update field should have changed from disabled to clickable. Click the folder icon and select the firmware file for your device.
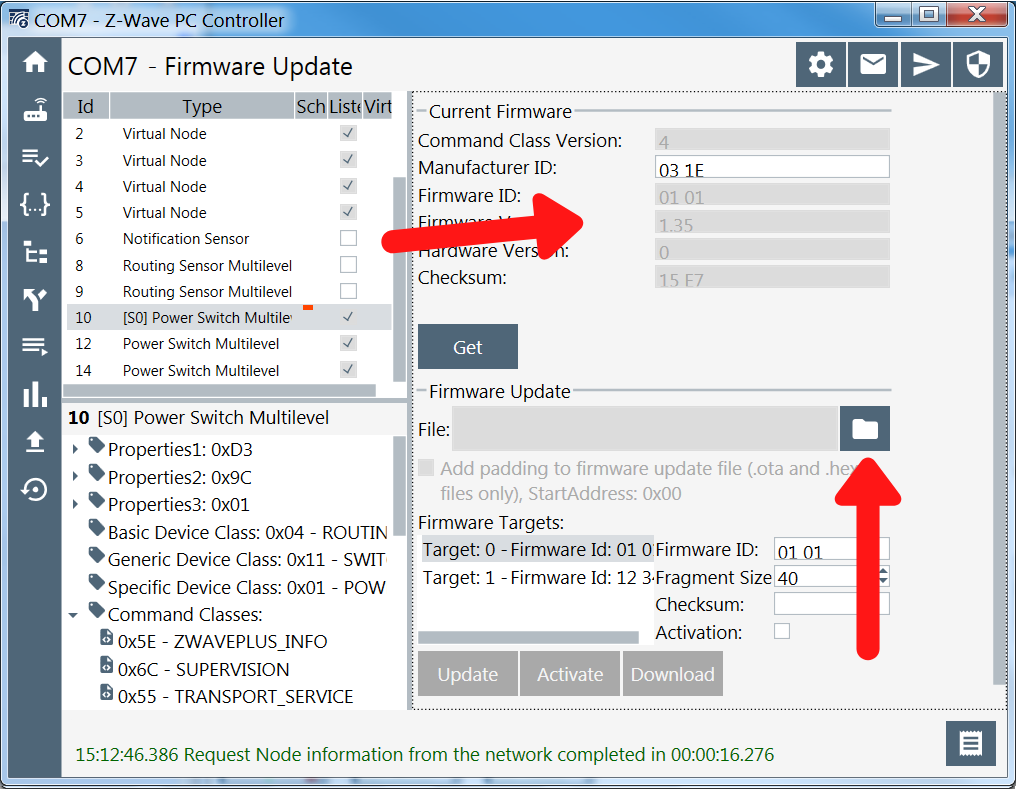
Select the Firmware Target. Usually this will be Target: 0. However, if there is more than 1 target listed, refer to the device manufacturer’s firmware installation instructions to confirm.
NOTE: At this point, you might want to do a double-check to make sure you’ve chosen the correct device and firmware file. If you incorrectly match a device with the wrong firmware, you could brick the device.
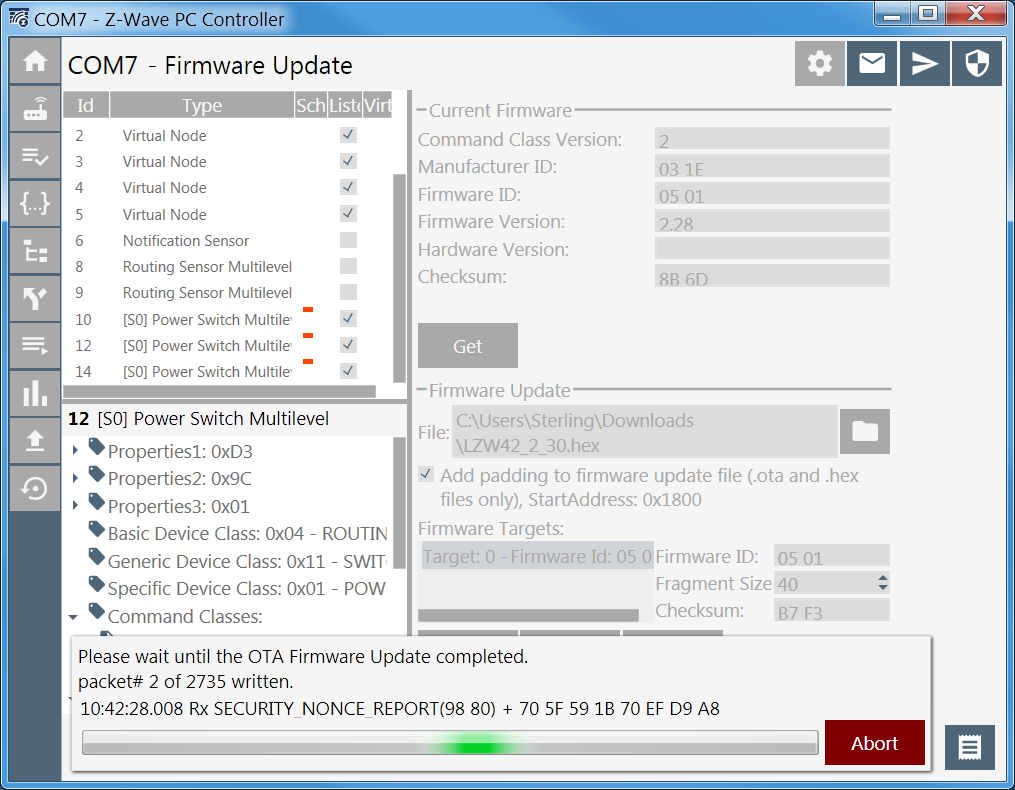
Once you click Update the firmware update process will start.
You can watch the update progress as it happens packet by packet. The speed of the update can range anywhere from a couple minutes to an hour. It will depend on the size of the firmware file and the proximity of the devices.
Once the update is complete, you should get a status update at the bottom of the window.
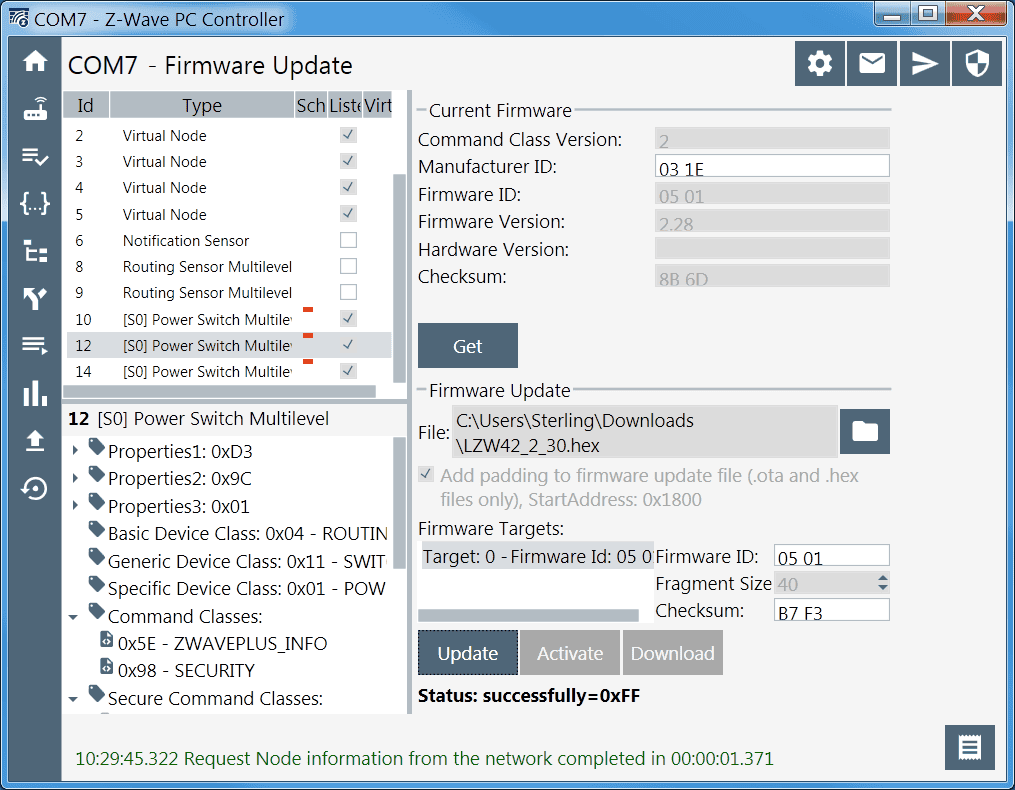
At this point, your device’s firmware is updated. If you have multiple devices, you will have to repeat the firmware update steps as described in Section 4 for each device.
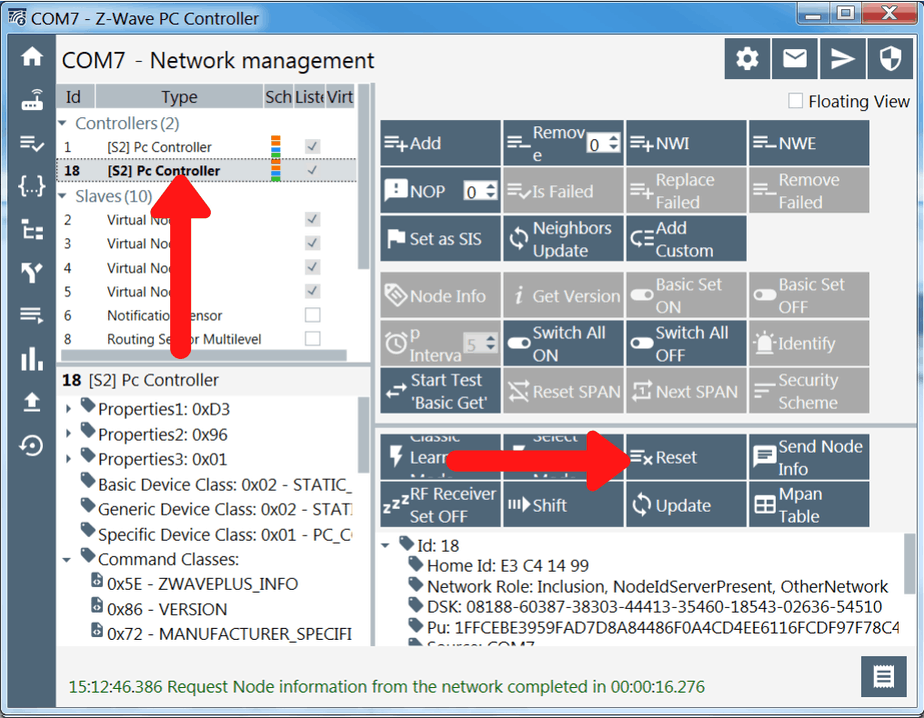
Remove the Z Wave stick from the network (optional)
There’s nothing wrong with leaving the Z-Wave stick connected to your network. But, if you want to use it somewhere else, you can remove it when you’re done updating the firmware.
To remove the stick, go to the Network management tab and select the Z-Wave stick. Then, press the Reset button on the Z-Wave PC Controller software. This will perform a factory reset on the Z-Wave stick.
Finally, delete the Z-Wave stick from your SmartThings network using the SmartThings app.
Final Thoughts
So that’s pretty much it. Hopefully, it was fairly painless for you.
Of course, the whole process would be even less painless if SmartThings supported OTA firmware updates for Zwave devices. SmartThings’ developers have been talking about doing it for several years, but there’s no guarantee of when or if it actually gets done.


Are you sure this is necessary? I’ve had the SmartThings app prompt me several times over the past year to update both Kwikset and Yale Z-Wave locks, as well as Leviton light switches, and all have updated successfully as far as I can tell
That’s great! There must be some devices that can update automatically. Last I checked, the Inovelli switches do require a manual update.
> NOTE: If you don’t know which device Id you need to update, go to your SmartThings developer console. Select My Devices. Then, find the Display Name of the device you would like to update, and retrieve the Device Network Id. Match that Id number with the Id numbers listed in the Network management console of the Z-Wave PC Controller software.
I don’t understand this. In My smartthings console I have network ids like “0D” and “1A” but the ids I see within the PC Controller seem to just be sequential numbers from 1 > 50
1A is hex, so you need to convert to decimal (26)
SmartThings has changed the “Add Device” screens in the iOS app since this post was written. By Device Type –> Generic ZWave Device is no longer present. In addition to Scan QR Code and Scan for nearby devices you now have a choice of Samsung devices and Partner devices. Neither has a Generic ZWave Device choice at present. With no QR Code on my Zooz ZST10 700 stick, instead I tried Scan for nearby devices–and was rewarded by having the ZWave stick show up as some kind of switch.
Nevertheless, it appeared to work for what I wanted to do, which was to determine the current firmware versions of several devices on my network without the necessity to remove each device from SmartThings and re-pair when finished.
Very nice writeup, Eric!
Thanks for the update. I know it’s been way too long since I updated this post.